
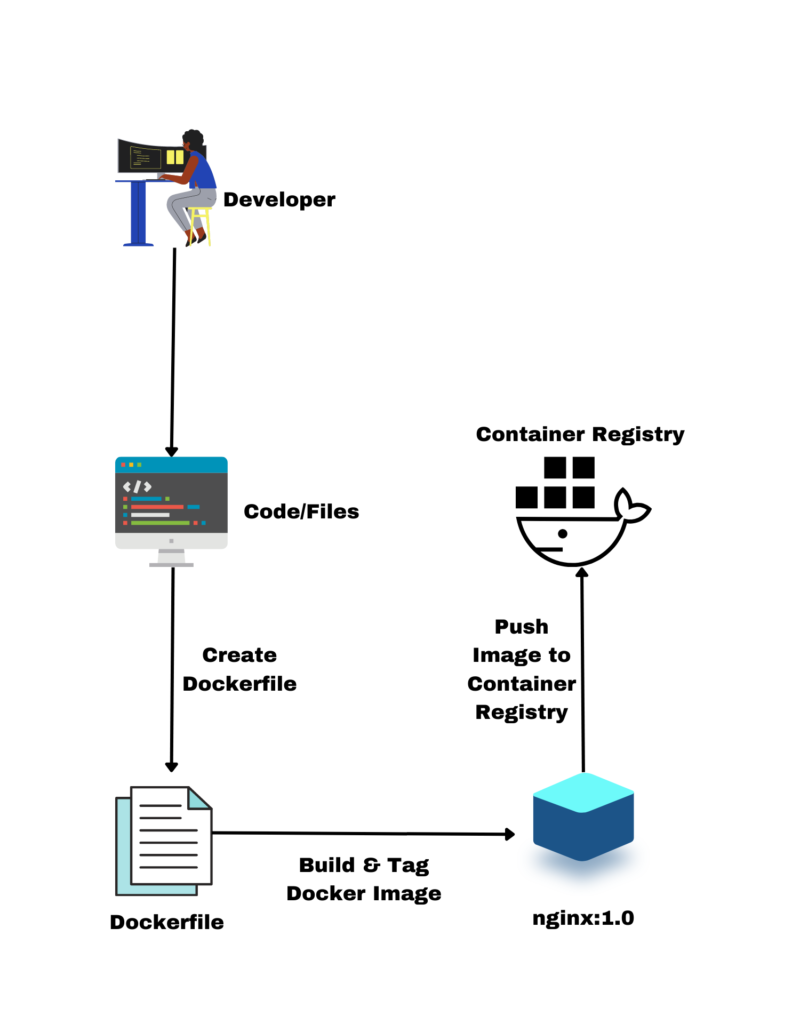
Docker is an invaluable tool for packaging, deploying, and running applications efficiently within lightweight containers. In this article, we will guide you through the process of building a Docker image from scratch and deploying your application as a Docker container using a Dockerfile.
Before we dive into the details, if you are new to Docker and want to familiarize yourself with the basics, we recommend referring to the our Docker explained blog post.
If you haven’t installed Docker yet, don’t worry! You can follow the step-by-step instructions in the Docker installation guide.
Understanding Dockerfile
At the core of building Docker images is the Dockerfile, a simple text file that contains instructions and arguments. Docker reads these instructions to automatically build images.
In a Dockerfile, instructions are placed on the left, while their corresponding arguments are placed on the right. It’s important to note that the Dockerfile should not have any file extension and should be named “Dockerfile.”
Let’s take a look at some essential Dockerfile instructions and their explanations in the table below:
| Instruction | Explanation |
| FROM | Specifies the base image from which the new image is built |
| RUN | Executes a command during the image build process |
| COPY | Copies files from the build context to the image |
| EXPOSE | Informs Docker that the container listens on specified ports |
| CMD | Provides default commands for the container |
| LABEL | Adds metadata about the image |
| ARG | Defines variables used during the image build process |
Build Docker Image Using a Real-World Example
In this section, we will demonstrate how to build a Docker image by creating an Nginx container with a custom index page. Follow the steps below to build your own Docker image:
Step 1: Creating the Required Files and Folders
Start by creating a folder named “nginx-image” and another folder named “files” within it. Additionally, create a ".dockerignore" file.
mkdir nginx-images; cd nginx-image; mkdir filesCreate a .dockerignore file
touch .dockerignoreStep 2: Creating Sample HTML and Config Files
To simulate a real-world scenario, we will create a simple HTML file and a config file as the application code. Navigate to the “files” folder and create an “index.html” file. Copy the desired content into the file.
nano index.htmlCopy the following code in index.html file and save it.
<html>
  <head>
    <title>Index File for Our Docker Image</title>
  </head>
  <body>
    <div class="container">
      <h1>My First App</h1>
      <h2>This is my first app</h2>
      <p>Hello world!, This is running via Docker nginx container</p>
    </div>
  </body>
</html>
Next, create a file named “default” and add the necessary configuration content.
cd files
touch default
nano default
Copy the following content in default file and save it.
server {
    listen 80 default_server;
    listen [::]:80 default_server;

    root /usr/share/nginx/html;
    index index.html index.htm;

    server_name _;
    location / {
        try_files $uri $uri/ =404;
    }
}
Step 3: Choosing a Base Image
In the Dockerfile, we use the “FROM” command to specify the base image for our new image. The base image is typically sourced from the Docker Hub or another container registry. In this case, we will choose the “ubuntu:18.04” base image.
It’s important to prioritize using official and verified base images to mitigate potential vulnerabilities. For production environments, consider opting for minimal base images like Alpine or Distroless, which offer smaller image sizes.
Step 4: Creating the Dockerfile
Create a file named “Dockerfile” within the “nginx-image” folder. Below is a sample Dockerfile for our use case:
FROM ubuntu:18.04
LABEL maintainer="[email protected]"
RUN apt-get update; apt-get -y install nginx
COPY files/default /etc/nginx/sites-available/default
COPY files/index.html /usr/share/nginx/html/index.html
EXPOSE 80
CMD ["/usr/sbin/nginx", "-g", "daemon off;"]
Let’s go through each step:
- The “LABEL” instruction adds metadata about the maintainer of the image (optional).
- The “FROM” instruction pulls the Ubuntu 18.04 base image from the Docker Hub.
- The “RUN” instruction installs Nginx within the image.
- The two “COPY” instructions copy the necessary files from the local “files” directory to their respective destinations within the image.
- The “EXPOSE” instruction informs Docker that the container will listen on port 80.
- Finally, the “CMD” instruction specifies the command to run the Nginx server when the Docker image launches.
To ensure that Nginx stays in the foreground and attaches to the console process for standard input, output, and error, we include the “daemon off;” directive and use the “-g” option to provide a directive to Nginx.
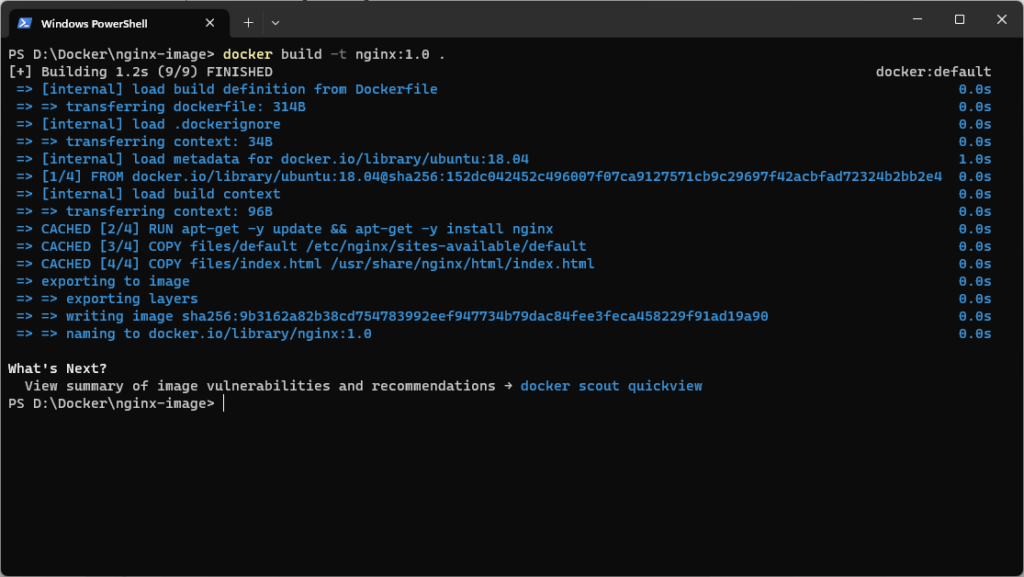
Step 5: Build Docker Image
nginx-image
├── Dockerfile
└── files
    ├── default
    └── index.html
Your final folder and file structure should resemble the one outlined above. Now, let’s build the Docker image using the following command:
docker build -t nginx:1.0 .In the command above:
- The “-t” option is used to tag the image.
- “nginx” is the chosen name for the image.
- “1.0” represents the tag name. If no tag is specified, it defaults to “latest”.
- The dot “.” denotes the Dockerfile location as the build context.
To list the available images, execute the following command:
docker imagesYou should see the “nginx” image with the specified tag, such as “nginx:1.0”.

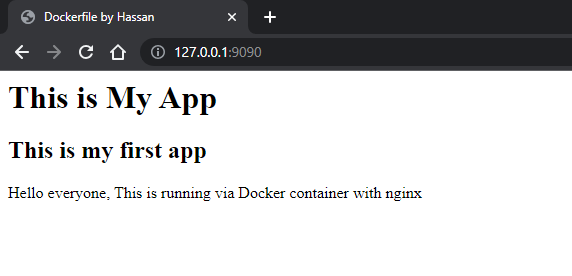
Running the Docker Image as a Container
Now that we have built the image, let’s run it as a Docker container. Use the following command:
docker run -d -p 9090:80 --name webserver nginx:1.0Here’s what the command does:
- The “-d” flag runs the container in detached mode.
- The “-p” flag maps the local port 9090 to the container’s port 80.
- “–name” specifies the name of the container, which we set as “webserver”.
To verify that the container is running, use the following command:
docker psYou should see the running container in the list.

To access the custom index page of the container, open a web browser and go to http://<host-ip>:9090.
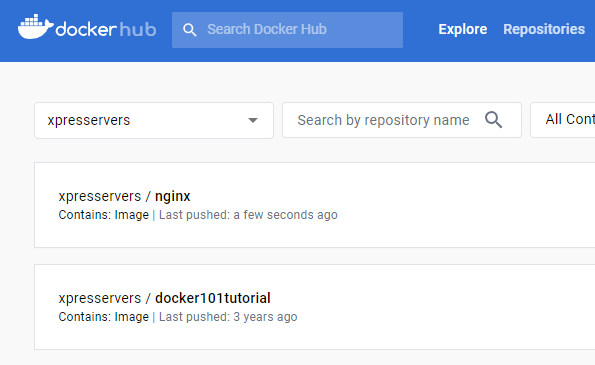
Pushing the Docker Image to Docker Hub
To share your Docker image with others, you can push it to Docker Hub. Begin by creating an account on Docker Hub if you haven’t already.
Once you’ve created an account, log in using the following command:
docker loginProvide your Docker Hub credentials when prompted.

Next, tag the image with your Docker Hub username:
docker tag nginx:1.0 your-dockerhub-username/nginx:1.0Replace “your-dockerhub-username” with your actual Docker Hub username.
To confirm that the image has been tagged correctly, run the command:
docker imagesYou will see the tagged image in the list.

Finally, push the image to Docker Hub:
docker push your-dockerhub-username/nginx:1.0Now, the image will be available in your Docker Hub account for others to use.
Using Heredoc with Dockerfile
Dockerfile also supports heredoc syntax, which is useful when dealing with multiple “RUN” commands or executing scripts. Here are a few examples:
RUN bash <<EOF
echo "This is a heredoc example"
echo "Multiple commands can be executed"
EOF
Also, let’s say you want to execute a python script from a Dockerfile, you can use the following syntax.
RUN python3 <<EOF
with open("/hello", "w") as f:
    print("Hello", file=f)
    print("World", file=f)
EOF
Additionally, heredoc syntax can be used to create files within the Dockerfile, as demonstrated in the Nginx example below:
RUN cat <<EOF > /etc/nginx/nginx.conf
     user www-data;
     worker_processes auto;
     error_log /var/log/nginx/error.log;
     pid /var/run/nginx.pid;
  events {
     worker_connections 1024;
     }
  http {
     server {
        listen 80;
           location / {
           root /var/www/html;
           index index.html;
           }
        }
   }
EOF
Dockerfile Best Practices
To ensure efficient and secure Docker image builds, it’s recommended to follow these Dockerfile best practices:
- Use a “.dockerignore” file to exclude unnecessary files and directories, enhancing build performance.
- Utilize trusted base images and regularly update them.
- Minimize the number of layers in your Dockerfile by consolidating instructions. Fewer layers improve build performance.
- Run containers as non-root users to mitigate security risks.
- Keep the image size small by avoiding unnecessary tools and using minimal base images. This reduces the attack surface and speeds up deployment.
- Use specific tags instead of the “latest” tag to avoid breaking changes over time. Semantic versioning is a recommended tagging method.
- Avoid using multiple “RUN” commands, as each command creates a cacheable layer, affecting build efficiency.
- Avoid sharing sensitive information or application credentials in the Dockerfile. Add sensitive files to the “.dockerignore” file.
- Place “EXPOSE” and “ENV” commands as late as possible in the Dockerfile.
- Utilize linters like “hadolint” to identify common issues and adhere to best practices.
- Follow the single process per container principle for better management and lightweight containers.
- Implement multi-stage builds to create smaller and more efficient images.
Common Docker Build Issues
During the Docker image build process, you might encounter a few issues. Here are some common ones and their resolutions:
- Syntax errors or invalid arguments in the Dockerfile: Correct the syntax errors to resolve this issue.
- Unassigned container names: Always specify a container name using the “docker run” command to avoid potential problems.
- Port allocation conflicts: If you encounter a “Bind for 0.0.0.0.:8080 failed: port is already allocated” error, it means another software or service is using the port. Check the active ports using the “netstat” or “ss” commands and choose a different port or stop the conflicting service.
- Failed package downloads: Docker might fail to download packages due to internet connectivity issues or other dependencies. Ensure that the container has proper internet access and resolve any dependency issues.
Docker Image Registries
For official and verified base images, it is recommended to use container registries such as Docker Hub, Google Container Registry, or other public registries listed below:
| Registry | Base Images |
| Docker Hub | Docker Hub based images |
| Google Cloud | Google Container Registry [Distroless base images] |
| AWS | AWS Elastic Container Registry (ECR) |
| Microsoft Azure | Azure Container Registry |
| Harbor | Harbor Registry |
| Red Hat | Red Hat Quay Registry |
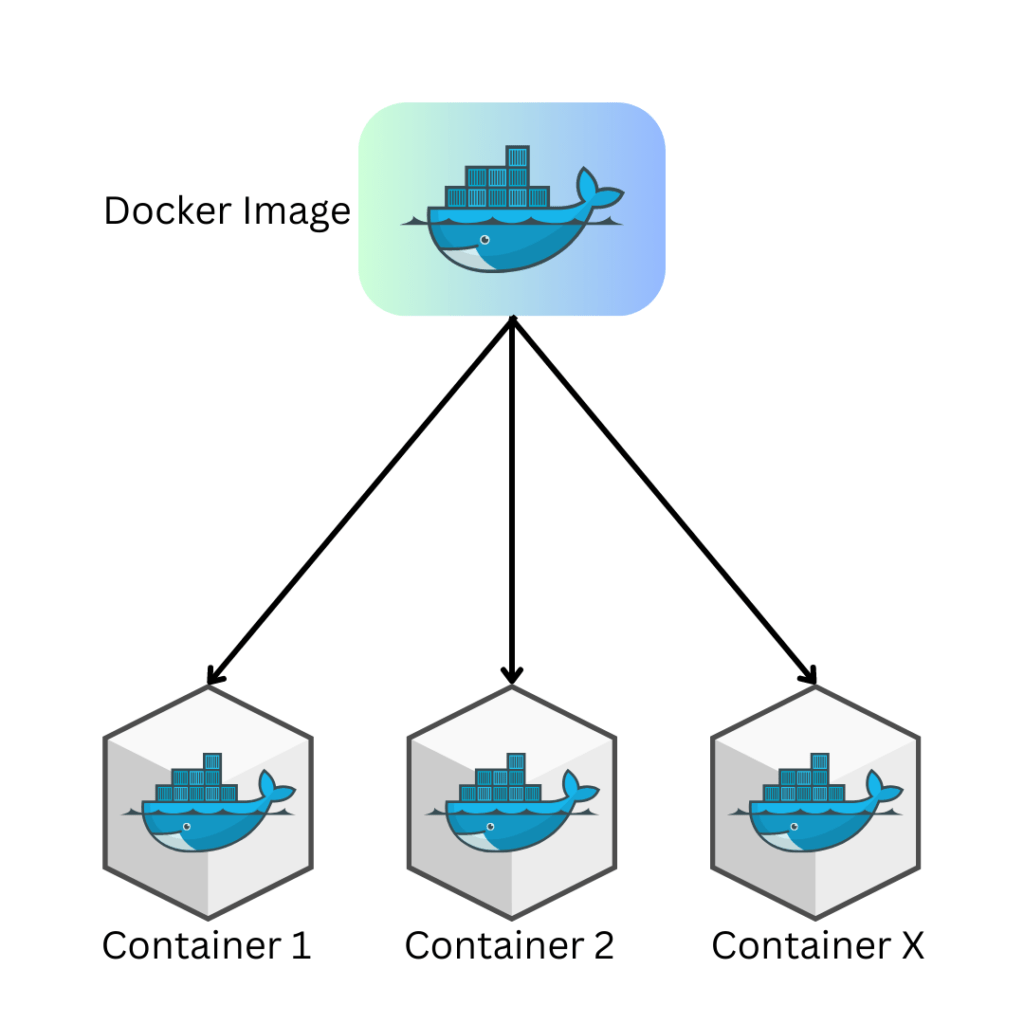
Docker Image vs. Containers
To clarify the distinction between Docker images and containers:
- A Docker image represents a snapshot of the file system and application dependencies. It serves as an executable package that includes all the necessary components to run an application.
- Images are composed of read-only layers stacked on top of each other.
- A Docker container is an instance of a Docker image. When you create a container from an image, a writable layer is added on top. Multiple containers can run from the same image, each with its unique data and state.
- Containers can exist independently of images. However, images are required to run containers.
- Deleting a container removes the writable layer, but the image remains intact.
Frequently Asked Questions about Docker Image Build
Q: How can I use base images from container registries other than Docker Hub?
A: By default, Docker is configured with Docker Hub as the container registry. However, you can use images from other registries by providing the full URL of the image in the Dockerfile. For example, “FROM gcr.io/distroless/static-debian11” fetches the image from the Google Container Registry.
Q: What is the Docker build context?
A: The Docker build context refers to the location on the Docker host where the code, files, configs, and Dockerfile are present during the build process. It can be specified as a dot [.] or the path to a folder. It’s best to only include the necessary files in the build context to avoid bloated Docker images.
Q: How can I build a Docker image from a Git repository?
A: To build a Docker image from a Git repository, make sure the repository contains the Dockerfile and any required files for the image build. You can use the “docker build” command, specifying the Git repository as the build context.
Conclusion
In this article, we provided a comprehensive guide to building Docker images and running applications as Docker containers using a Dockerfile. We explored the intricacies of Dockerfile instructions and shared best practices for writing efficient Dockerfiles.
As a DevOps engineer, it is crucial to have a solid understanding of Docker best practices when implementing them in projects. Furthermore, understanding container image workflows is essential for learning Kubernetes.
If you’re interested in exploring alternative container tools, consider Podman. Check out our Podman tutorial to learn more about its capabilities and usage.